Three.js-体积光
别人的原理
参考自这个文章。
体积光也是基于后处理,用叠加texture的方式来实现,整个流程如下:
- Render the scene, with the light source as white and all occluding objects as black, to a texture.
- With a shader, apply a parameterized radial blur to that texture to create the lighting effect
- Additively blend that result over a render of the normally lit scene and display on screen
…estimate the probability of occlusion at each pixel by summing samples along a ray to the light source in image space. The proportion of samples that hit the emissive region versus those that strike occluders gives us the desired percentage of occlusion…
我将这个示例的代码下载过来后,升级到threev134版本,经过调试,发现没有光照效果。看起来像是根本没有将这一层叠加上去。
感觉是用了两个EffectComposer的缘故。
光源的光线方向是四散的,我只需要给它做个遮罩模型,只放出来光源球体上的一部分,就可以形成手电筒的效果了。
可以在shadertoy搜索Volumetric Light查看别人做的效果:
搜索手电筒Flashlight也可以
我真正使用的原理
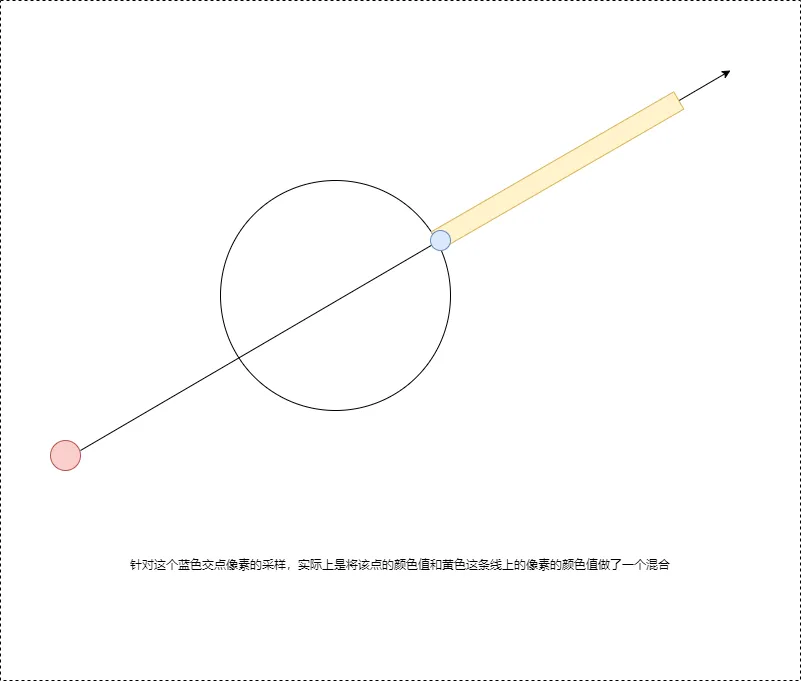
这是使用的采样来实现的。
这样有个缺陷:因为是采样,并非正确的物理光照,因此是没有折射、反射、阴影效果的。
关键代码
function getVolumetericLightShader() {
  return {
    uniforms: {
      tDiffuse: { value: null },
      // TODO:这个不该写死,应该跟随物体位置动态变化(应该位于物体的背后,这样才能往物体前面发出光线),否则光束就会变成从中心点射向六个方向
      lightPosition: { value: new THREE.Vector2(0.5, 0.5) },
      exposure: { value: 0.18 },
      decay: { value: 0.95 },
      // 采样密度
      density: { value: 0.8 },
      weight: { value: 0.4 },
      // 采样率,数值越高,效果越好;数值低了有条纹状的阴影
      samples: { value: 100 },
    },

    vertexShader: `
    varying vec2 vUv;
    void main() {
        vUv = uv;
        gl_Position = projectionMatrix * modelViewMatrix * vec4( position, 1.0 );
    }
    `,

    fragmentShader: `
        // gl_FragCoord是0-1的坐标范围
        // vec2 uv = gl_FragCoord.xy/u_resolution;
        varying vec2 vUv;
        // 2D纹理采样器
        uniform sampler2D tDiffuse;
        // 纹理中心点
        uniform vec2 lightPosition;
        // 曝光度
        uniform float exposure;
        uniform float decay;
        uniform float density;
        uniform float weight;
        uniform int samples;
        const int MAX_SAMPLES = 100;
        void main() {
          // 当前像素在纹理上的坐标
          vec2 texCoord = vUv;
          // 相对于纹理中心点的坐标,用于确定【采样范围】
          vec2 deltaTextCoord = texCoord - lightPosition;
          // 计算单次采样的步进坐标值:采样数越大,采样点步进坐标就越小
          // 因为光束是朝着一个方向发射的,因此这里不需要考虑负数的情况;
          // 每个点的实际采样范围是一条45度的直线上的samples个点!!!
          deltaTextCoord *= 1.0 / float(samples) * density;
          // 采样纹理,获取像素原始颜色,这里第一个参数tDiffuse为null,是采用默认的纹理单元0:GL_TEXTURE0
          vec4 color = texture2D(tDiffuse, texCoord);
          // 亮度衰减
          float illuminationDecay = 1.0;
          // 采样
          for(int i=0; i < MAX_SAMPLES; i++) {
            if(i == samples){
              break;
            }
            texCoord -= deltaTextCoord;
            vec4 sampleValue = texture2D(tDiffuse, texCoord);
            // 给采样点颜色算上亮度衰减系数和权重系数
            sampleValue *= illuminationDecay * weight;
            // 给原始颜色叠加上采样点颜色
            color += sampleValue;
            // 修改亮度衰减系数
            illuminationDecay *= decay;
          }
          gl_FragColor = color * exposure;
        }
        `,
  };
}
效果
手电筒
这个最简单,帧数也高,用的raymarch
资料
体积光原理和常用算法
https://zhuanlan.zhihu.com/p/21425792
由这个文章触发的灵感:体积光还可以用于辉光效果
基于分层后处理实现的体积光
https://medium.com/@andrew_b_berg/volumetric-light-scattering-in-three-js-6e1850680a41
参考文章1-基于Three的代码讲解:
(WebGL) Volumetric Light Approximation in Three.js - Blog - (BKcore) Thibaut Despoulain
参考文章2-原理公式讲解:
基于Three.js的实现:
GitHub - hsimpson/threejs-volumetric-spotlight: Volumetric spotlight with three.js